
Python is a widely used high-level, interpreted, dynamic programming language. Python supports object-oriented, imperative, and functional or procedural programming styles. The Python development team provides a Windows installer file to quickly install Python on Windows systems. As of today, Python 3.10 is the latest version available for installation.
This tutorial will help you to install Python 3 on a Windows system.
Step 1 – Download Python Windows Installer
First of all, download the required version of the Python installer from the official download page. Visit Python official download page and download required version of installer. For this tutorial, I have downloaded the latest version of Python 3.10.
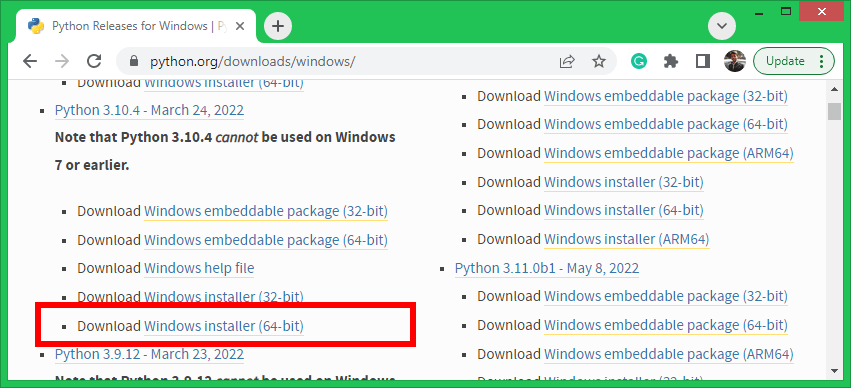
You can find the installer file under the Downloads directory.
Step 2 – Installing Python on Windows
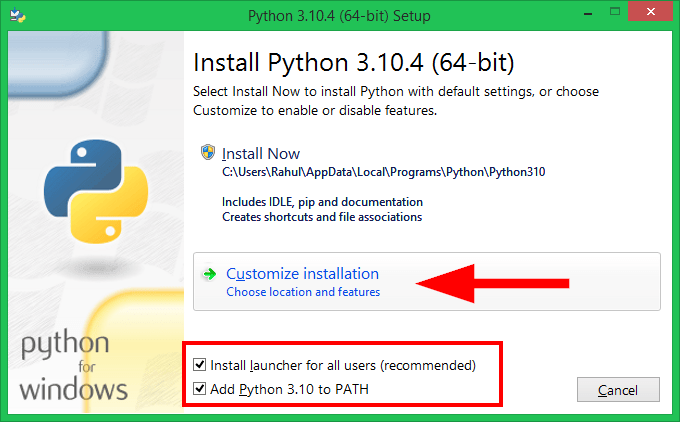
Once the installer file is downloaded successfully. Double click on the installer file and follow the installation wizard.
- First, check the boxes for Install python for all users and Add Python 3.10 to PATH. Then click on Customize Installation button.
- Now select the features you need to install. Select all features (if required) and click Next.
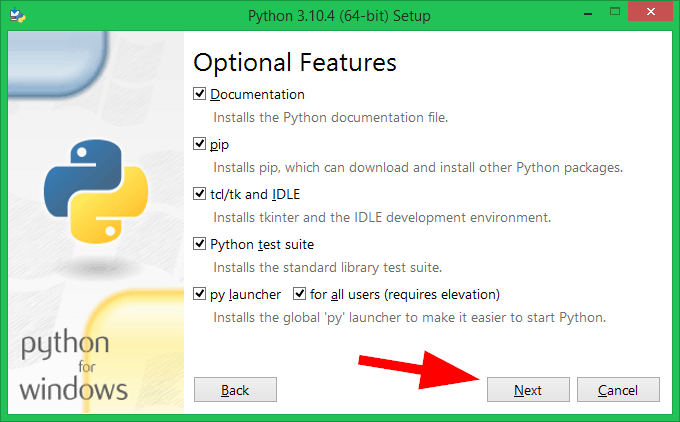
- You will get a list of Advanced Options. Select the required options or select all. Now click the Install button to begin installation.

- You will see a successful installation message like below.
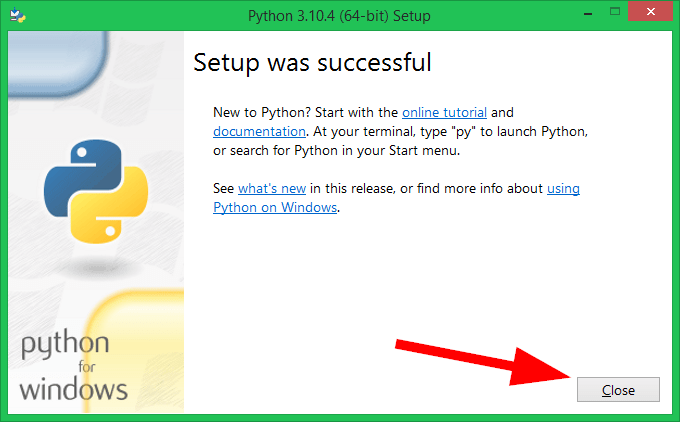
That’s it. You have successfully installed Python 3 on a Windows system.
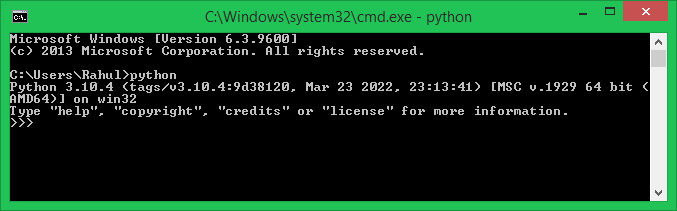
Step 3 – Verify Python Installation
The Python installer will update the PATH environment variable. Open the windows command prompt and type the python command. If everything is installed and configured successfully, you will see a message like the below.
Conclusion
This tutorial helped you to install Python on a Windows system. As the Python 3 includes the venv module. you can now create the virtual environment for the Python applications.
1 Comment
How do install python on ubuntu … btw nice article exact on point