
KDE is an international team co-operating on development of opensource software for desktop computing. K Desktop Environment (KDE) was founded in 1996 by Matthias Ettrich. KDE community is producing an integrated set of cross-platform applications designed to run on Linux, FreeBSD, Solaris, OS X and Microsoft Windows systems.
Kubuntu comes with a preloaded KDE Desktop environment, which is a combination of Ubuntu + KDE Plasma Desktop.
KDE Editions
You might want to know about available KDE editions. Here is a brief description of all 3 main KDE editions that is available for installation.
- KDE full: This comes with the full packages of KDE with all default applicaitons.
- KDE standard: This version comes with few selected applications only.
- KDE Plasma: This is a minimal version of KDE comes with basics application’s such as the file manager, browser, and text editor etc.
This tutorial will help you to install the lightweight KDE Plasma desktop environment on a Ubuntu Linux system.
Before We Begain
Login to your Ubuntu system and run the following commands to update the Apt cache and update all the currently installed packages.
sudo apt update && sudo upgrade
Installing KDE Desktop on Ubuntu
You can install the K Desktop Environment packages from the default repositories.
Now you have to choose one of the three options available for KDE installation.
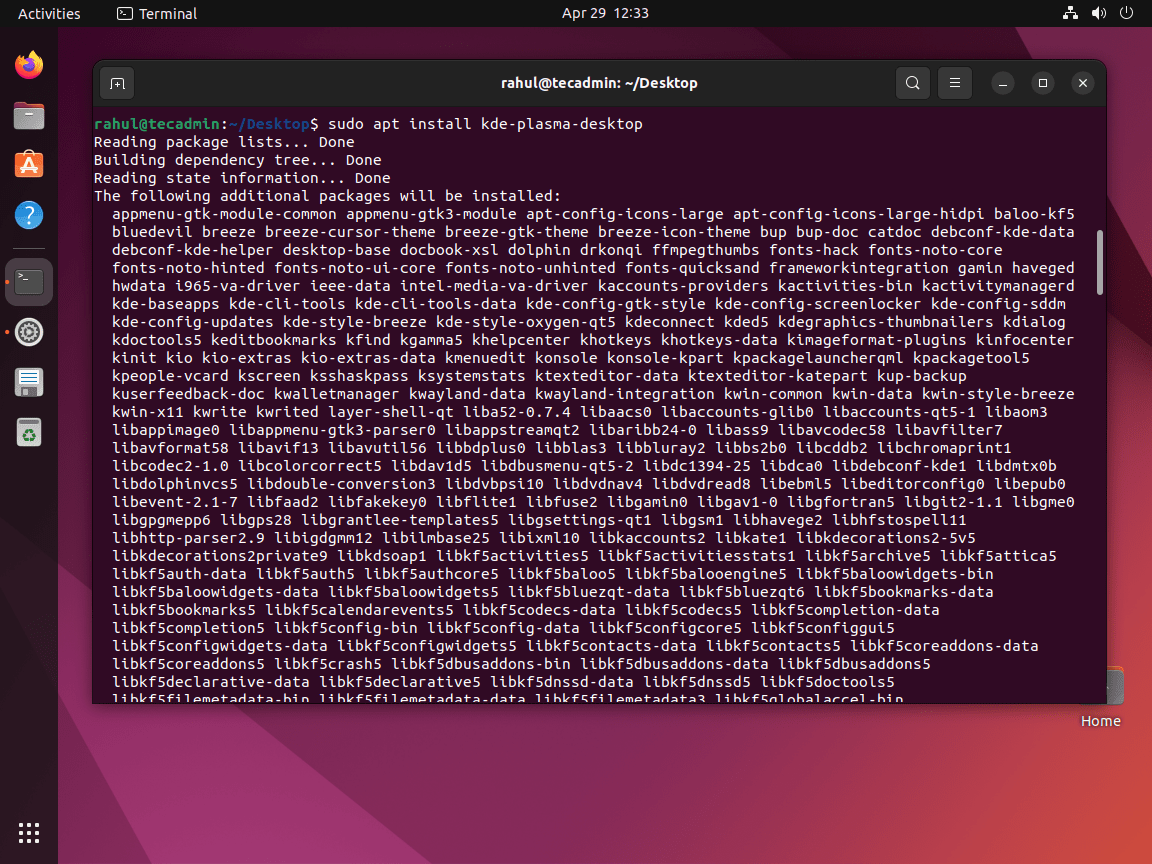
- KDE Plasma (Recommended) – Use the following command to install the KDE Plasma Desktop environment on a Ubuntu system.
sudo apt install kde-plasma-desktop - You can also install KDE standard edition to get more feature.
sudo apt install kde-standard - To use all KDE features install the Full KDE version. Its large in size, that will take more disk space and longer time to installation.
sudo apt install kde-full
This installation process will take a longer time, depending on the internet speed. A large number of packages will be installed on your system.
During the installation, the system will prompt to select the display manager. The KDE uses the sddm as a default display manager. Use the UP+DOWN arrow keys to select the sdda and press TAB to select OK and hit Enter.
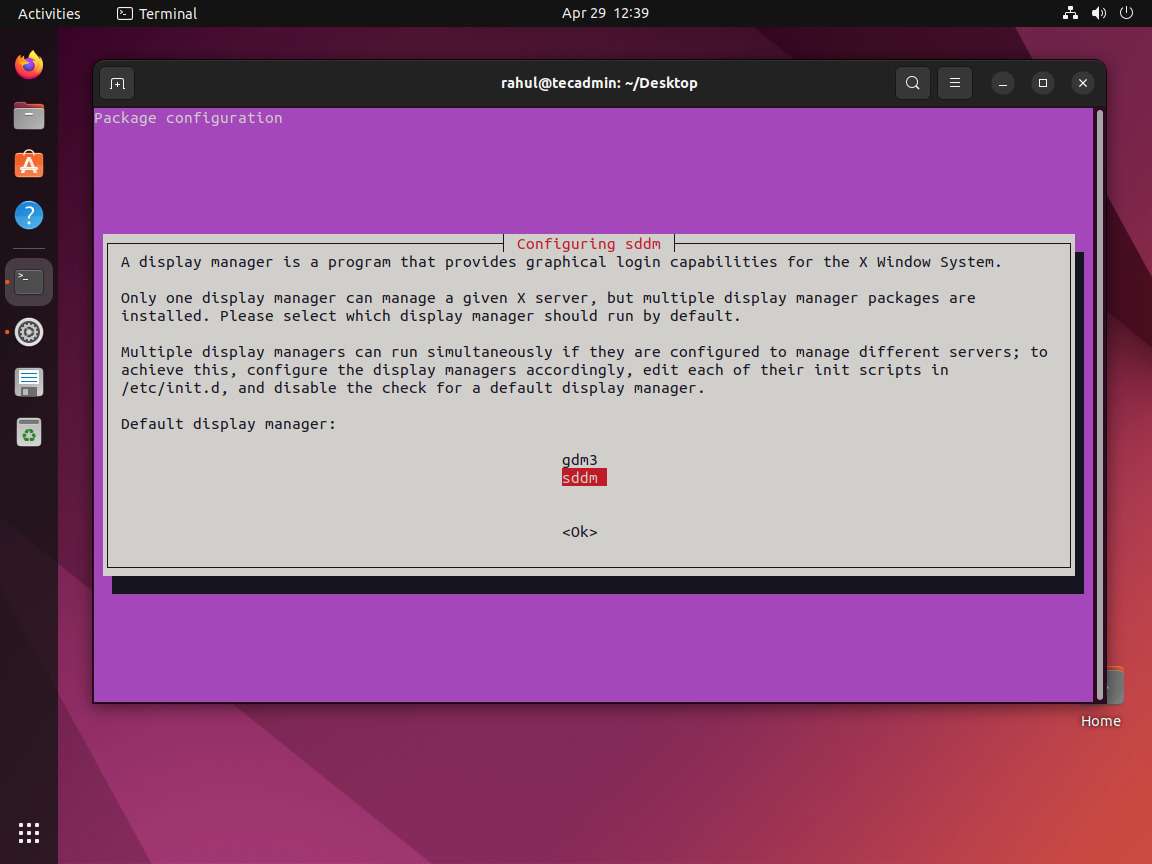
In case, you selected the wrong option. Not to worry, let the installation finish. The default display manager will show you the login screen of the previous desktop environment. At the login screen, you can choose, which desktop should be loaded after user login.
Later in this article, we will discuss, how to change the display manager in the Ubuntu system.
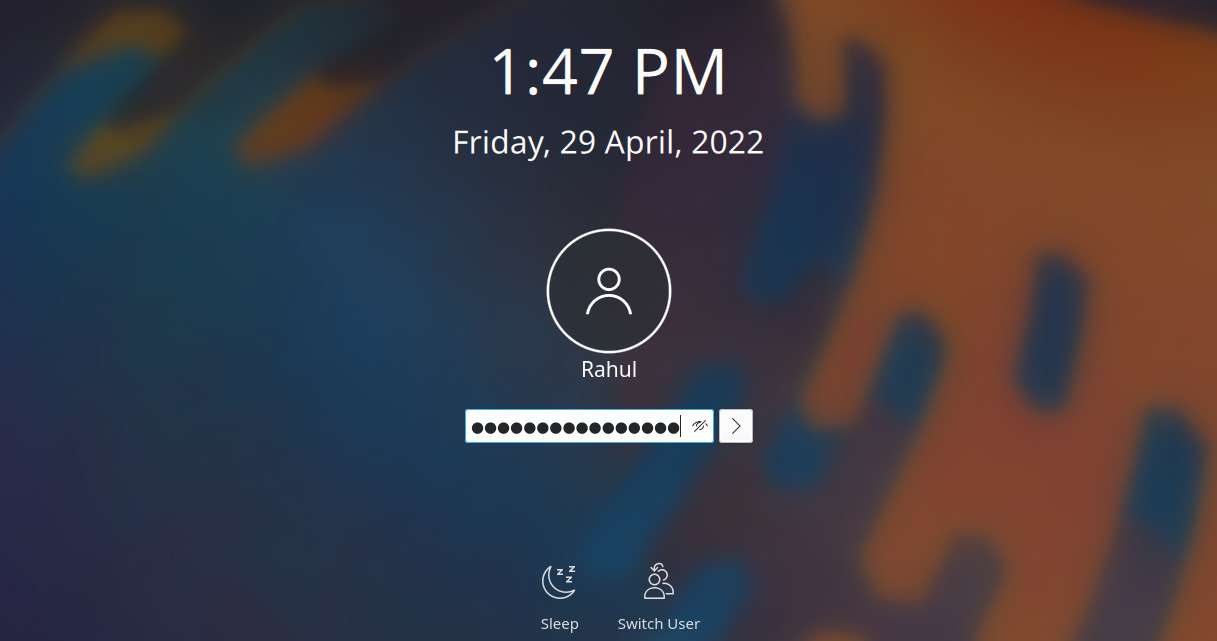
Now reboot your system
sudo reboot
After rebooting your system, You will see the KDE login screen.
After login into the system, you can find the KDE Plasma desktop version under the system settings.
Open System Settings >> Select “About this system” under System Administration section in sidebar.
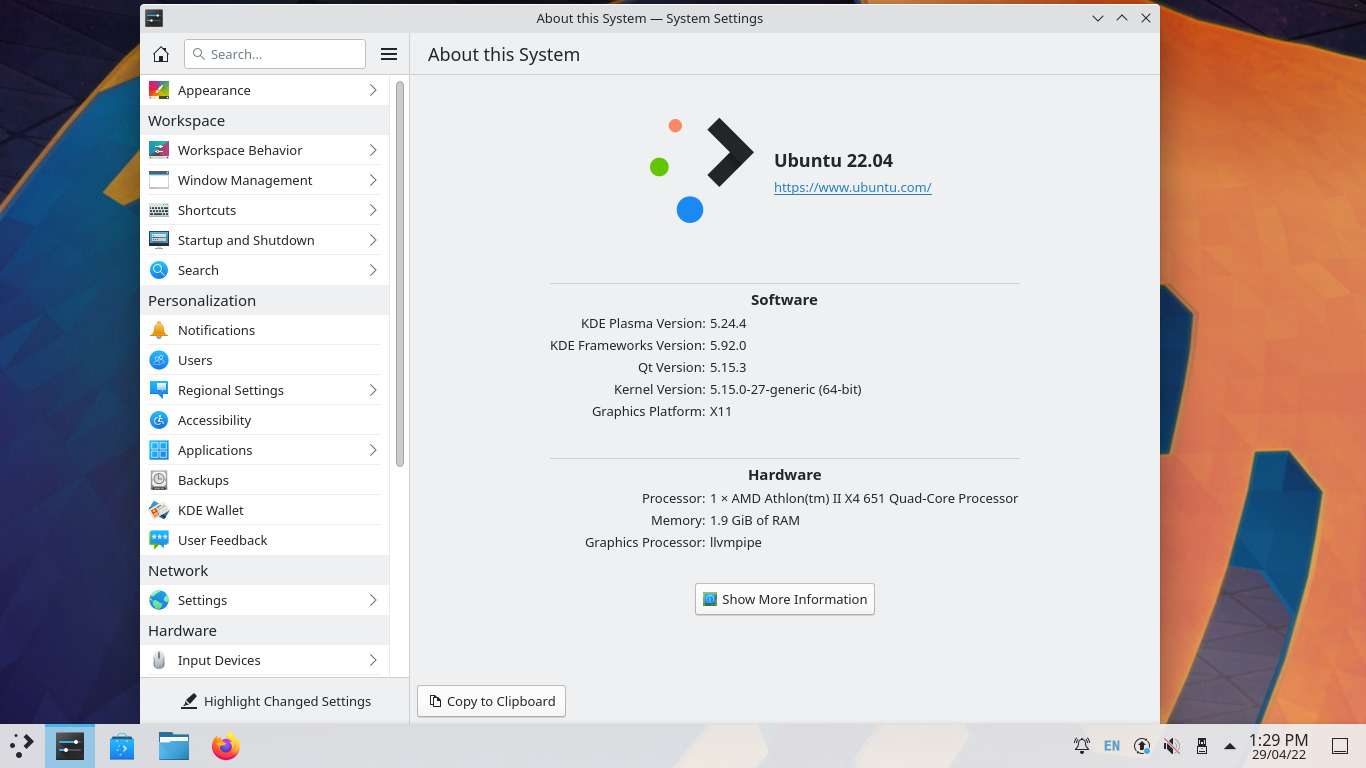
Congratulations, After completing the above steps. You will have successfully installed KDE Plasma Desktop on your Ubuntu system.
Changing Display Manager in Ubuntu
You can also default display manager any time by running the following command:
sudo dpkg-reconfigure sddm
Select the display manager of your choice in the pop-up and hit the Ok button.
During the next reboot, you will see an updated display manager login screen.
Conclusion
This tutorial helped to install the KDE Plasma Desktop environment on a Ubuntu system. Also provides you the instructions to change the display manager in the Ubuntu system.


2 Comments
hi rahul,
i have ubuntu 10 and can’t install kde what do i do it says could not find package kubuntu-desktop and also same for kde-standard maybe too old?
Thanks for sharing your views….