
Apache Maven is a powerful build and project management tool for Java projects. It is an open-source tool developed by the Apache Software Foundation and is used for managing projects written in Java and other languages. It is a popular tool for managing software builds, as it allows for quick and easy deployment of projects. It also provides a wide range of features including dependency management, project structure, and configuration.
One of the key advantages of using Apache Maven is that it allows for the easy integration of external libraries into a project. This makes it easier to create complex projects that require multiple external libraries. Another advantage of using Apache Maven is that it allows for the creation of custom-built scripts that can be used to automate the building process. It also makes it easier to maintain the integrity of a project as it allows developers to easily add new dependencies and update existing ones.
This guide will take you through the step-by-step process of installing Apache Maven on Ubuntu 22.04. Let’s get started!
Installing Java
Apache Maven can be configured on any system that has Java installed. The latest Maven version required JDK 1.7 or newer versions. On Ubuntu, you can run the following command to install JDK 11:
sudo apt updatesudo apt install default-jdk
Once the Java is installed, check the current default set Java version:
java -version
Output:openjdk 11.0.7 2020-04-14 OpenJDK Runtime Environment (build 11.0.7+10-post-Ubuntu-3ubuntu1) OpenJDK 64-Bit Server VM (build 11.0.7+10-post-Ubuntu-3ubuntu1, mixed mode, sharing)
Method 1: Installing Maven Using Apt
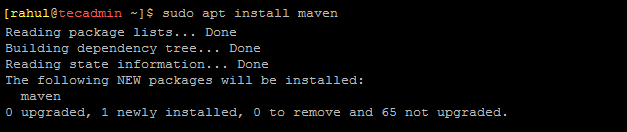
We can quickly install the Apache Maven using the Apt package manager. Open a terminal and execute the following command:
sudo apt install maven
You will notice that the old version of Apache Maven was installed from the Apt repository. The second method will help you to install the latest Maven version on the Ubuntu system.
Method 2: Installing Latest Maven From Source Code
Follow the below instructions to install the latest Maven version on Ubuntu systems:
- You can download Apache maven from its official website or use following command to download Apache Maven 3.8.6 on your system.
wget https://dlcdn.apache.org/maven/maven-3/3.8.6/binaries/apache-maven-3.8.6-bin.tar.gz - Now extract the downloaded Maven archive file using the following command.
sudo tar xzf apache-maven-3.8.6-bin.tar.gz -C /optsudo ln -s /opt/apache-maven-3.8.6 /opt/mavenThe above commands will extract Maven under the /opt directory and create a symbolic link /opt/maven to that directory.
- As you have downloaded pre-compiled Apache Maven files on your system. Now set the environment variables by creating a new file /etc/profile.d/maven.sh.
sudo vi /etc/profile.d/maven.shAdd the below content to the file:
1234export JAVA_HOME=/usr/lib/jvm/default-javaexport M2_HOME=/opt/mavenexport MAVEN_HOME=/opt/mavenexport PATH=${M2_HOME}/bin:${PATH}Save your file and close it.
- Next load the environment variables in the current shell using the following command.
source /etc/profile.d/maven.shDuring the next system reboot, the environment will automatically load.
- You have successfully installed and configured Apache Maven on your Ubuntu system. You can check the installed Maven version with the following command:
mvn -version
Check Maven Version - Finally, clean up the disk by removing the downloaded archive file.
rm -f apache-maven-3.8.6-bin.tar.gz
Uninstall (Remove) Apache Maven
If the Apache Maven is no longer required, you can uninstall it from your system.
Use the following command to uninstall maven using Apt package manager.
sudo apt remove --purge maven
If you have installed maven from the source code, use the following commands to remove it.
sudo unlink /opt/mavensudo rm -rf /opt/apache-maven-3.8.6
Conclusion
In this article, we discussed how to install Apache Maven on Ubuntu 22.04. We discussed the advantages of using Apache Maven and the steps involved in installing and configuring it. We also discussed how to set up a Maven project. With these steps, you can now start using Apache Maven on your system.
Apache Maven is a powerful tool for managing Java projects. It is a popular choice for managing software builds, as it allows for quick and easy deployment of projects. It also provides a wide range of features including dependency management, project structure, and configuration. If you are looking for an easy way to manage your Java projects, then Apache Maven is a perfect choice.
2 Comments
You are configuring it inside /opt and then setting it to /usr/local. This won’t work… The path sets should point to /opt/maven
Thanks Lea, Article is updated with the correct directory path.