Laravel is an open-source PHP web framework, designed for the faster development of web applications. It is based on the Symfony framework, follows the model–view–controller architectural pattern. At the time of writing this tutorial, Laravel 8 is the latest stable version available.
Laravel provides a rich command-line interface (CLI) known as Artisan. It provides helpful commands to perform operations for your applications.
This article will help you to install the Laravel PHP Framework on Ubuntu 20.04 LTS systems.
Step 1 – Installing LAMP Stack
First of all, you need to set up the LAMP stack on your Ubuntu system. Laravel required PHP 7.2.5 or higher version to be installed. Follow the below instructions to install all required packages and services on your system.
Install PHP
sudo apt install zip unzip software-properties-common
sudo add-apt-repository ppa:ondrej/php
sudo apt install -y php7.4 php7.4-gd php7.4-mbstring php7.4-xml php-zip
Apache2
sudo apt install apache2 libapache2-mod-php7.4
Install MySQL
sudo apt install mysql-server php7.4-mysql
You also need to to MySQL post installation instructions. Use this tutorial to find more details about MySQL installation.
Step 2 – Installing Composer
PHP Composer is used for install required dependencies for the PHP application. Execute the following commands to install and configure Composer on your system.
curl -sS https://getcomposer.org/installer | php
sudo mv composer.phar /usr/local/bin/composer
sudo chmod +x /usr/local/bin/composer
Step 3 – Download and Install Laravel
The latest Laravel version is available under the Github repository. Use the below command to clone the master branch of the Laravel from the GitHub repository.
cd /var/www
git clone https://github.com/laravel/laravel.git
Switch to the laravel directory and use the composer to install all dependencies required for the Laravel framework.
cd /var/www/laravel
sudo composer install
The dependencies installation may take some time as per your network speed. After successfully installing all dependencies, set the proper permissions on all files.
chown -R www-data.www-data /var/www/laravel
chmod -R 755 /var/www/laravel
chmod -R 777 /var/www/laravel/storage
Step 4 – Create Environment Settings
Next, create the Laravel environment confiugration file. You can do it by renaming the .evn.example file to .env. This will use to setup application environment for the project.
mv .env.example .env
Now generate base64 random number encryption key, which used by the Illuminate encrypter service.
php artisan key:generate

Application key set successfully.
Edit the .env configuration file and update the required settings. Also, make sure APP_KEY is properly set as generated in the above command.
vi .env
APP_NAME=Laravel
APP_ENV=local
APP_KEY=base64:HFdS7c9rhDp+AeHu7kc2OLBPuxHqq2BQ/1gfFWEpoAk=
APP_DEBUG=true
APP_URL=http://localhost
...
You can also change the APP_NAME with the name of your application and APP_URL to the URL you need to access your Laravel application.
Step 5 – Create MySQL User and Database
Next, create a MySQL database for your Laravel application. Also, create a MySQL user to connect the database from the Laravel application. Login to your MySQL server and create MySQL database and user by running the following commands.
1 2 3 4 5 | CREATE DATABASE laravel; CREATE USER 'laravel'@'localhost' IDENTIFIED BY 'secret'; GRANT ALL ON laravel.* to 'laravel'@'localhost'; FLUSH PRIVILEGES; quit |
Now edit the .env file and update database settings.
DB_CONNECTION=mysql
DB_HOST=127.0.0.1
DB_PORT=3306
DB_DATABASE=laravel
DB_USERNAME=laravel
DB_PASSWORD=secret
Step 6 – Apache Configuration
Next, edit Apache default virtual host configuration file (ie: 000-default.conf) and update Document Root to the Laravel public directory as below:
vim /etc/apache2/sites-enabled/000-default.conf
Update the configuration like below:
<VirtualHost *:80>

        ServerAdmin [email protected]
        DocumentRoot /var/www/laravel/public

        <Directory />
                Options FollowSymLinks
                AllowOverride None
        </Directory>
        <Directory /var/www/laravel>
                AllowOverride All
        </Directory>

        ErrorLog ${APACHE_LOG_DIR}/error.log
        CustomLog ${APACHE_LOG_DIR}/access.log combined

</VirtualHost>
Reload Apache configuration changes by restarting service using below command
sudo systemctl restart apache2
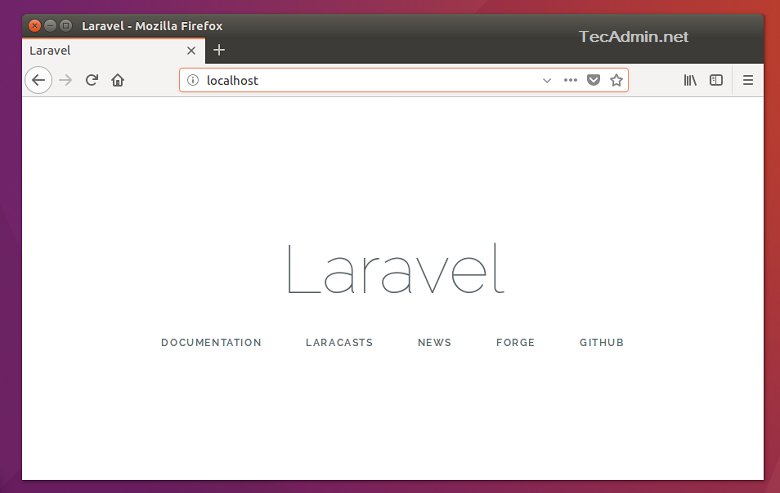
Step 7 – Access Laravel Application
You have successfully configured the Laravel 8 PHP framework on your system. Access Laravel application in your favorite web browser
Let’s start building an awesome application using Laravel 7 PHP Framework.
Conclusion
This tutorial explained to you to create a new Laravel application. Also provided you with steps to configure the Laravel application with Apache webserver.


22 Comments
Thanks for this step by step…It was really helpful to me.
First time installing laravel on my localhost and it went smooth
Step 2 – Installing Composer.
Why such a difficult decision?
Can be made easier: sudo apt install composer
These commands ensures to install latest composer version on your system.
Thank you very much
Thank you for posting the tutorial. Despite following the instructions accurately, I receive an error when trying to install Laravel from GIT:
fatal: could not create work tree dir ‘laravel’: Permission denied
I tried:
sudo git clone https://github.com/laravel/laravel.git
But this creates other problems (Apache stops running.)
Hi John,
Verify the Apache configuration with command:
sudo apachectl configtest
hello, just change the permission on your newly created laravel directory. If you are using any linux distribution, just move to /var/www then run the commond “chmod 777 .”
From there you should be able to clone laravel from git
*UPDATE*
On the above comment I meant change permission of you /var/www directory and not laravel, coz at this point you dont have laravel directory yet
In PackageManifest.php line 122:
Undefined index: name
Script php artisan optimize handling the post-update-cmd event returned with error code 1
hi, i have the same problem : “UnexpectedValueException
The stream or file “/var/www/laravel/storage/logs/laravel.log” could not be opened: failed to open stream: Permission denied” … i use
sudo chmod -R 777 /var/www/laravel/* . then it’s works fine… but i don’t know if using a wildcard “*” is correct. ¿Can you tell me?
Congrats, greetings from Chile .
Set 777 permission on storage directory not the entire project. Try below commands.
chmod -R 755 /var/www/laravel
chmod -R 777 /var/www/laravel/storage
[Composer\Downloader\TransportException]
The “http://repo.packagist.org/p/fideloper/proxy%243c476aa5bc1f7be4de12519b02c7d32e5
271ecf43f8ad9119472305e52cc7d85.json” file could not be downloaded: failed to open s
tream: HTTP request failed!
help
Thanks a lot! Very useful guide 🙂
One note: When installing on Ubuntu 20.* on AWS an additional step can be set as optional:
“apt install zip unzip php-zip”
https://stackoverflow.com/questions/41274829/php-error-the-zip-extension-and-unzip-command-are-both-missing-skipping
Thanks Robert, I have included your suggestion in tutorial.
UnexpectedValueException
The stream or file “/var/www/laravel/storage/logs/laravel.log” could not be opened: failed to open stream: Permission denied
Try: chmod -R 777 /var/www/laravel/storage/logs/
What about chmod 755 ?
After running:
sudo composer install
I was told to not run composer as a super-user. Your documentation may be in need of updates.
Try running the command without, it might say you don’t have the permission. in which case you would need to be root.
Apache mode is not completed in this tutorial, it just opens the default apache page.
I got the Laravel page.
COngratulations from Brasil!!!! VEry good and thanks